
Flashing the Tasmota firmware on Sonoff devices
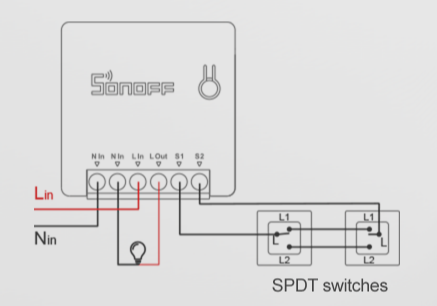
The Sonoff Mini switches are great and inexpensive alternatives for home automation. The device employs the ESP8266 microchip, so it is trivial to replace the default manufacturer firmware. They also support existing one-way or two-way switches, providing a flexible and low-cost solution for lighting automation.
The factory firmware that comes with the Sonoff switches is compatible only with the eWeLink Cloud App, limiting the potential integrations only to other Sonoff devices. A DIY mode, which offers a REST API, is available, but it does not support more advanced use cases, like MQTT support, for example. However, the open-source Tasmota firmware is compatible with the device and can replace the default factory firmware. This post will detail how to flash the Tasmota firmware on the Sonoff Mini switches.
Updating the factory firmware
First, we will update the manufacturer’s firmware to a version above 3.3. You can skip this step if your firmware’s version is already updated.
- Install the eWeLink app and follow the manufacturer’s instructions to pair the device with the app.
- Update the firmware to the latest version.
Installing the Tasmota Firmware
Follow the steps below to flash the custom firmware:
-
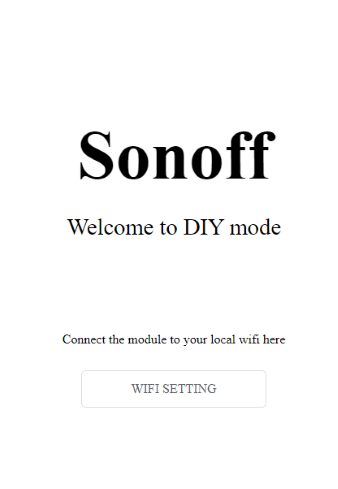
After powering on the switch, long press the button for 5 seconds, the blue led should start flashing, indicating that the device is in DIY mode.
-
Connect your computer or smartphone to the ITEAD_XXXXX WiFi network. The password is “12345678”.
-
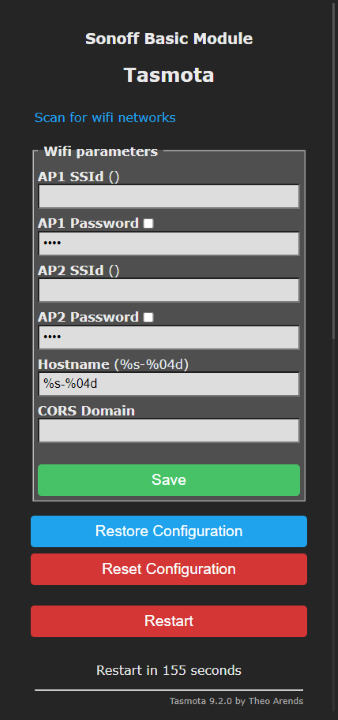
Open the browser on the address http://10.10.7.1. You should see the screen below:
-
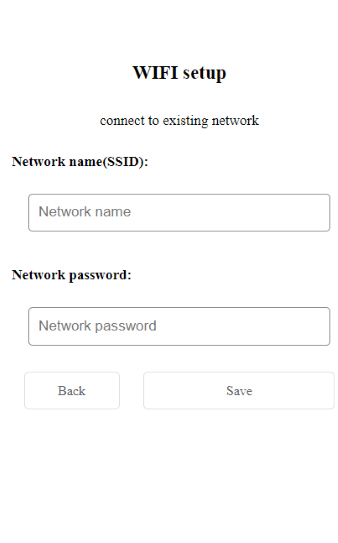
Configure your home WiFi network and password. The switch supports only 2.4Ghz networks.
-
If the connection is successful, the blue led should start flashing twice each second.
-
Download the Sonoff DIY Tool .
-
Download the latest version of the Tasmota lite firmware.
-
Open the Sonoff DIY Tool and search for the device on the network.
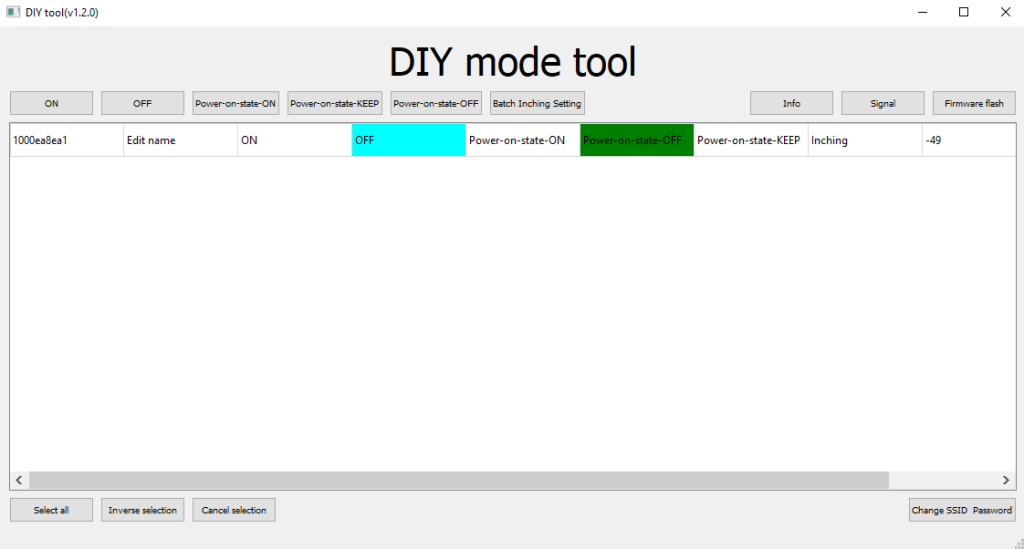
- Select the device, click on the “Update Firmware” button and select the Tasmota lite image file.
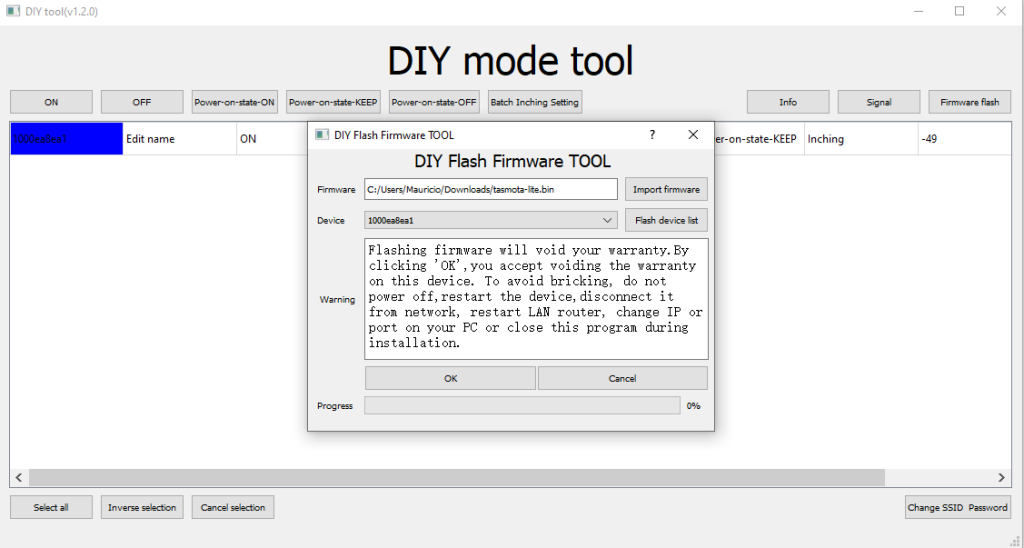
-
After the update finishes, connect your computer or smartphone to the tasmota_XXXXXX-XXXX network.
-
Open the browser on the address http://192.168.4.1.
-
Configure your home WiFi network on the Tasmota Web UI. You can also set a fallback WiFi network in case the primary is offline.
-
Reconnect to your WiFi and open the WebUI again now at it’s new address at your home network.
-
Open the “Other parameters” menu option and configure the Sonoff Mini Template below:
{"NAME":"Sonoff Mini","GPIO":[17,0,0,0,9,0,0,0,21,56,0,0,255],"FLAG":0,"BASE":1} -
You should also give a name to the device and enable MQTT if you are going to use it.

After doing the steps above, the Sonoff device will be fully functional with the Tasmota firmware. Check the official Tasmota documentation to get more information about all the supported features. The next step is to connect the switch to your home automation server. See the article about home assistant for more information.
Back to top ↑