
Home automation without vendor lock-in
Last year I spent some time researching alternatives to automate my home without vendor or cloud lock-in. I did not want my devices to stop working in the event of an AWS outage or if any manufacturer goes out of business. I also wanted to have full control over my data and flexibility to mix devices with different protocols and vendors.
After some experimentation, I arrived at a setup that fulfilled the objectives above using only open-source software. Although not user-friendly, it is, at least in my opinion, superior to any commercial alternative available on the market today.
In this post, I’ll detail the steps I followed to set up my home automation.
Prerequisites
The following hardware will be required:
-
SD Card (at least 32 GB)
-
Raspee ZigBee Gateway (if you want to integrate with Zigbee devices)
-
A set of compatible home automation devices (more on that below)
Home automation devices
My setup adopts mostly Xiaomi Aqara ZigBee and Sonoff WiFi devices, mainly because these were easy to find where I live. Here is a list of ZigBee devices compatible with the Raspee. If you want to use WiFi devices, check if they are based on the ESP8266 or ESP32 chips and are compatible with the Tasmota firmware.
Below is the list of ZigBee devices I have working on my home:
- Door & Window Sensor
- Two-way control module
- Motion Sensor
- Wireless Switch
- Temperature and humidity sensor
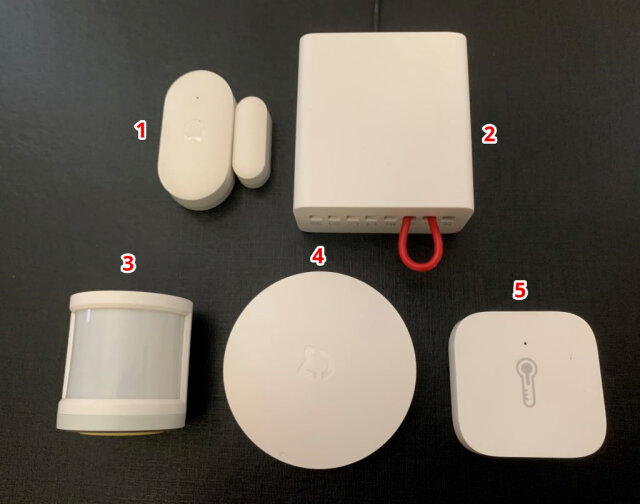
The Xiaomi Aqara Gateway is not required, as the Raspberry Pi will be our gateway, but you can still use it as a siren.
The following Sonoff WiFi devices are also working:
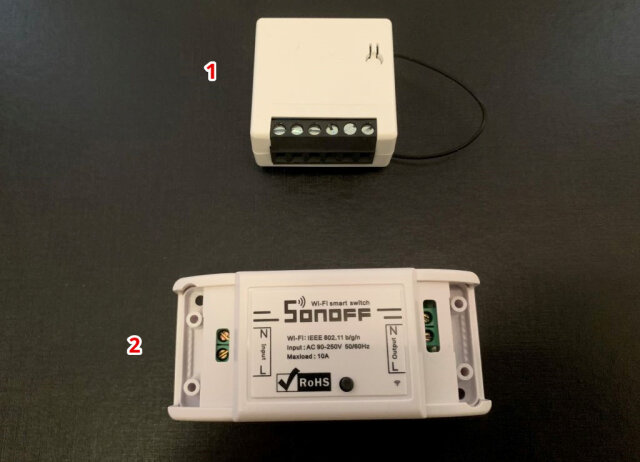
Before starting, you should install the Tasmota firmware on the WiFi devices. I have a blog post detailing how to replace the firmware on the Sonoff Mini.
Installing the software
I’m using Home Assistant as my automation hub. Home Assistant is an open-source home automation software that can run on a Raspberry Pi, supports hundreds of integrations, and is fully programmable to support custom needs.
To install Home Assistant on the Raspberry Pi, follow the steps described on this page. Confirm that the Home Assistant is configured with a static IP. You can do this by reserving an IP on your router’s DHCP server or following these steps.
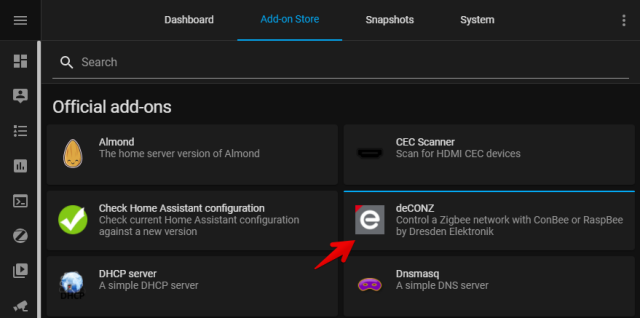
After installation, power off the device and connect the Raspbee. Now we are going to install the Deconz add-on for Home Assistant. This extension will install the Deconz software, which interfaces with the Raspbee hardware, and the Phoscon App, which provides a simple Web UI to pair and configure the ZigBee devices.
To install the add-on, log in as administrator, go to the Supervisor menu item and search for Deconz.
We then need to configure the serial port where the Raspbee is connected. You should open the Configuration tab from the Deconz add-on and include the following line:
device: /dev/ttyAMA0
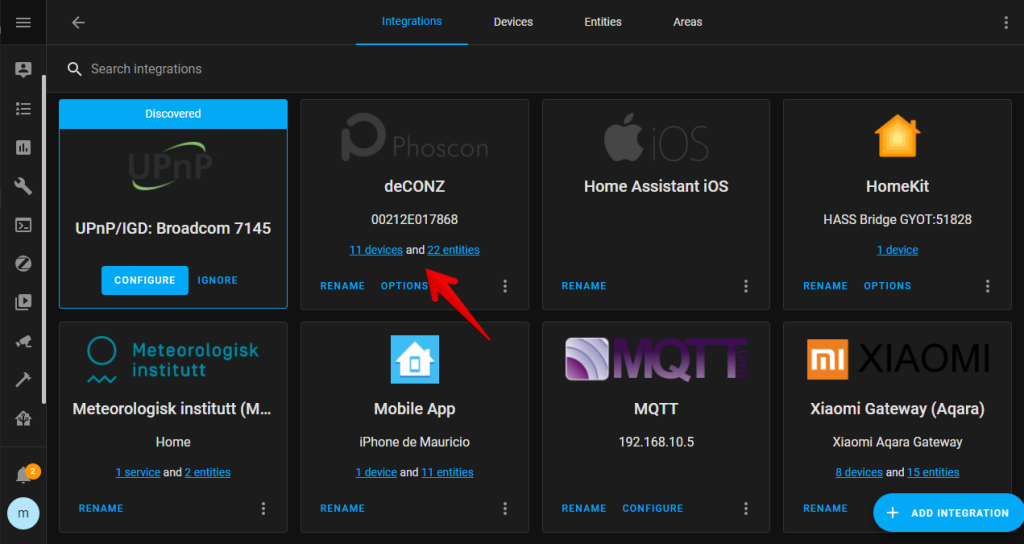
The next step requires the installation of the Deconz integration. Go to the menu “Configuration”, then “Integrations”, and add a new Deconz integration pointing to the local Deconz instance. This integration will add the all the ZigBee devices on the local network as entities on the Home Assistant configuration:
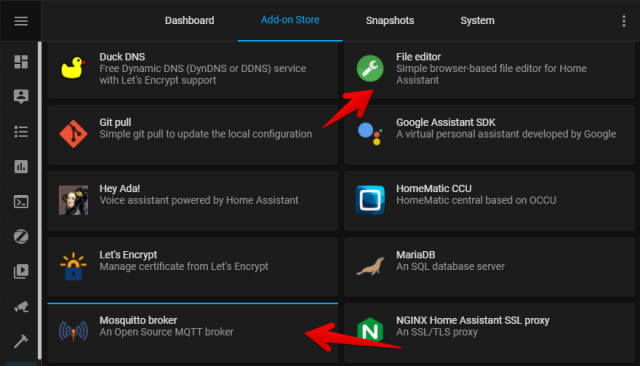
If you are going to use WiFi devices flashed with Tasmota, you should also install the Mosquitto MQTT broker add-on and the File Editor add-on.
After the installation, add a new user on the Configuration tab of the Mosquitto MQTT broker add-on using the following snippet:
logins:
  - username: mqtt
    password: mqtt
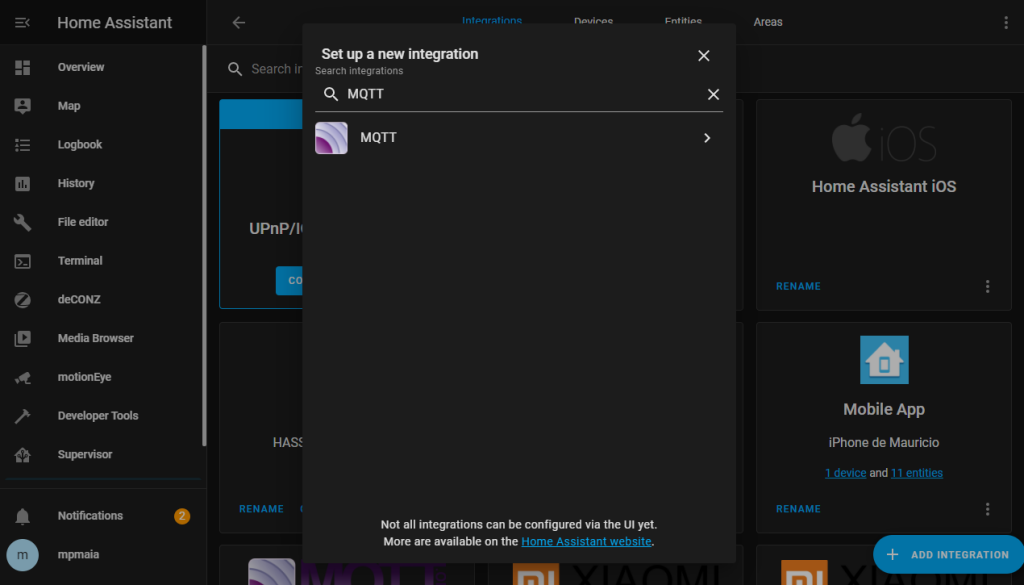
With the MQTT broker configured, add a new MQTT integration pointing to the local Mosquitto MQTT broker.
Pairing ZigBee devices
To pair a new ZigBee device, follow the steps below:
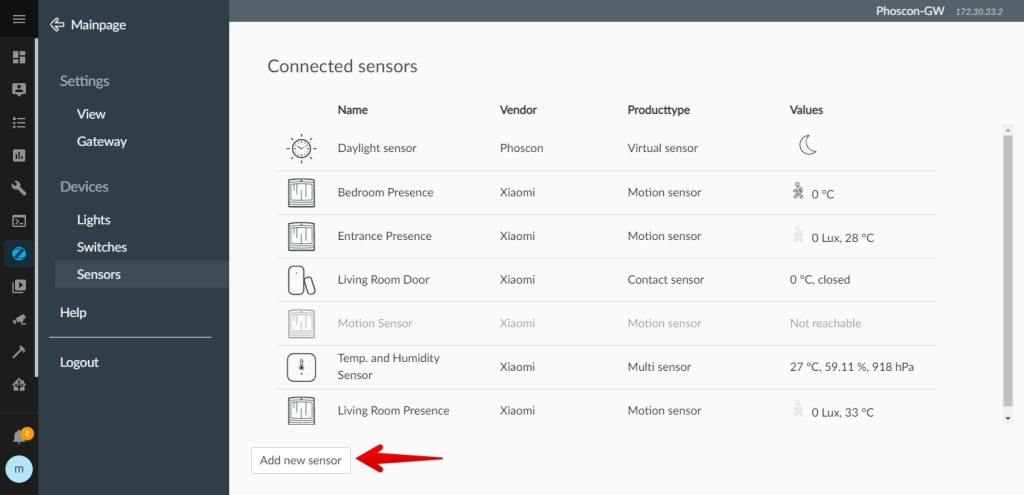
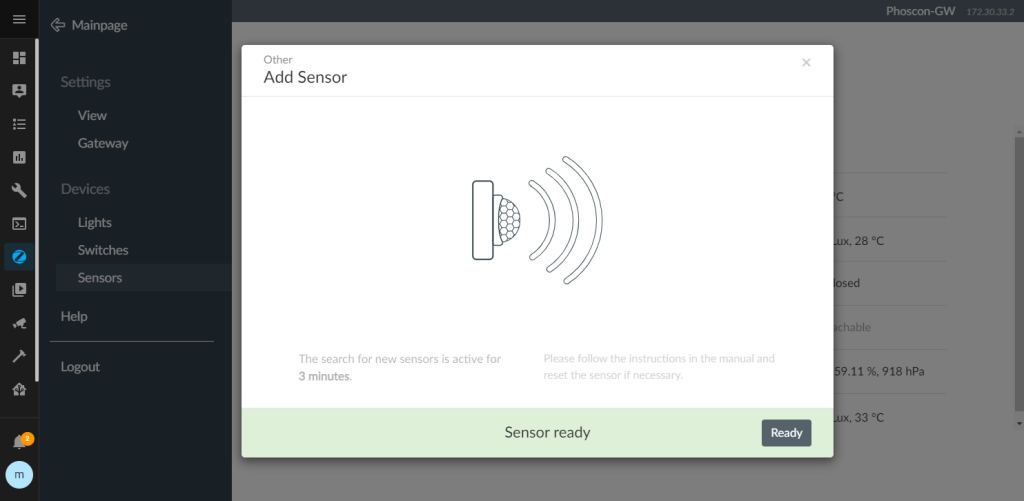
- Open the Phoscon App, select the menu Sensors and then click on “Add new sensor.”
- Follow the instructions of your device to start the pairing process. On Aqara Xiaomi devices, you should press the reset button for at least 3 seconds.
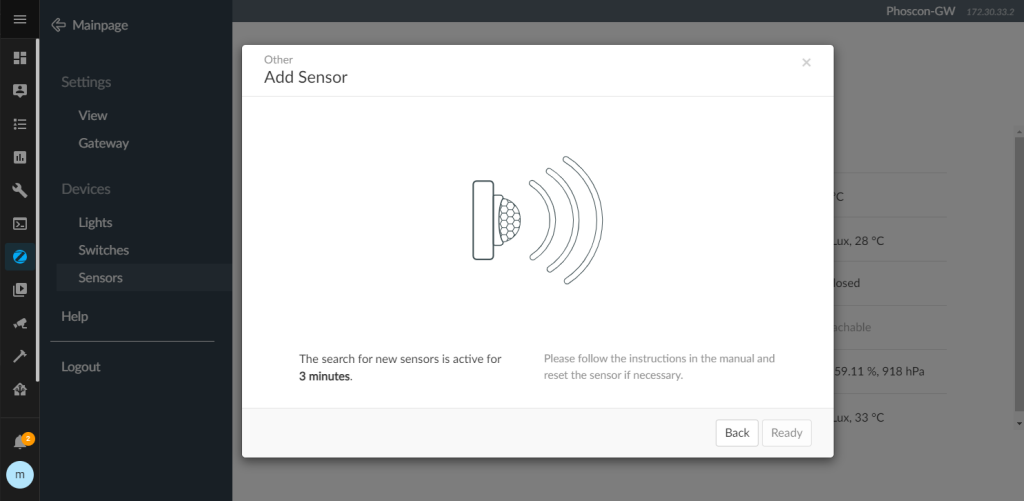
- The Phoscon App should show that the pairing was successful. After that, you can choose a name for your device and it will be available as a new sensor on Home Assistant.
You can find more information about the Phoscon App here.
Checking the ZigBee network for problems
You can use the Deconz module to visualize the ZigBee network and check for any connection problems.

Adding Sonoff WiFi devices
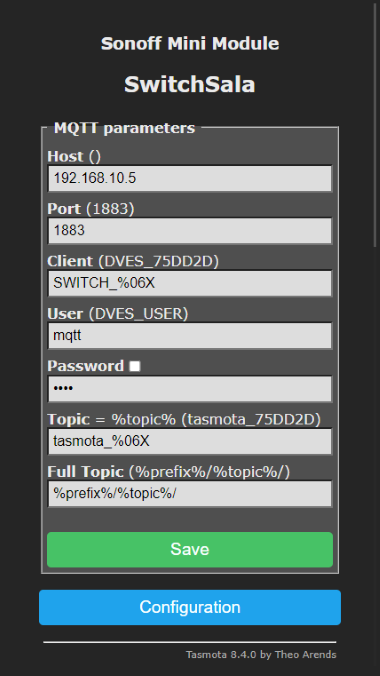
Configure the MQTT server on each Tasmota device. Set the IP address of the Raspberry PI and the user and password configured on the Mosquitto add-on. You can also change the name of the topic of the device.
On the Home Assistant UI, open the File Editor add-on and add the following lines to the configuration.yaml (changing the name of each topic according to your device’s configuration):
switch:
  - platform: mqtt
    name: "Living Room Switch"
    unique_id: "tasmota_switch_75DD2D"
    state_topic: "stat/tasmota_75DD2D/RESULT"
    value_template: ""
    command_topic: "cmnd/tasmota_75DD2D/POWER"
    payload_on: "ON"
    payload_off: "OFF"
    availability_topic: "tele/tasmota_75DD2D/LWT"
    payload_available: "Online"
    payload_not_available: "Offline"
    qos: 1
    retain: false
Setting up custom automations
Home Assistant supports integrating with hundreds of services. For example, it is possible to integrate it with Alexa, Google Assistant, IFTTT and Apple HomeKit. In this article, I’ll show here how to set up a simple integration with a Telegram Bot that warns you when a door is opened and allows you to turn WiFi switches on and off remotely.
First, create a new Telegram Bot and set it up on the configuration.yaml file:
telegram_bot:
  - platform: polling
    api_key: BOT API KEY HERE
    allowed_chat_ids:
      - CHAT ID HERE
Getting warned when a door opens
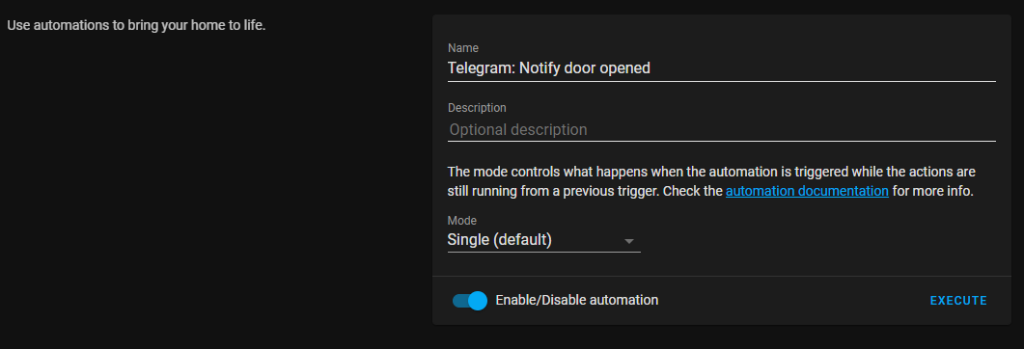
Go to the Automation item on the Home Assistant Configuration menu and create a new entity following the example below:
- Name the new automation and set the mode as Single.
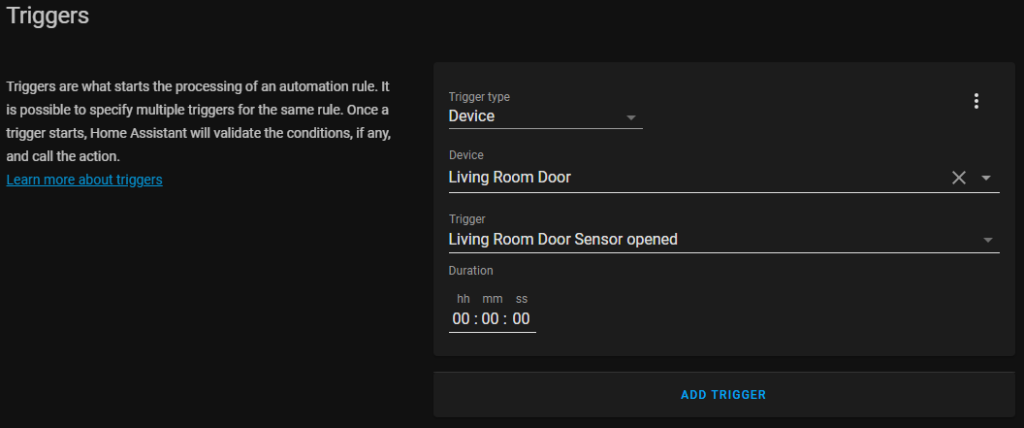
- Set the trigger. In this example, is when the living room door opens.
-
You can also set conditions for the automation to work. Conditions can be things like “when I’m not at home” or “only during night hours.”
-
Configure the action to be executed when the trigger and conditions are satisfied. My automation will send a Telegram message through the bot. It is possible to add multiple actions.

Creating a command to toggle a switch
Add a new automation according to the steps below:
- Name the automation and set the mode as Single.
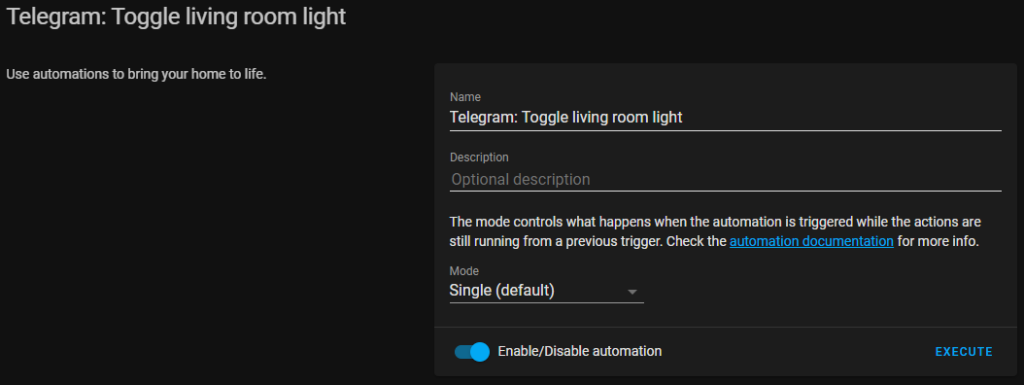
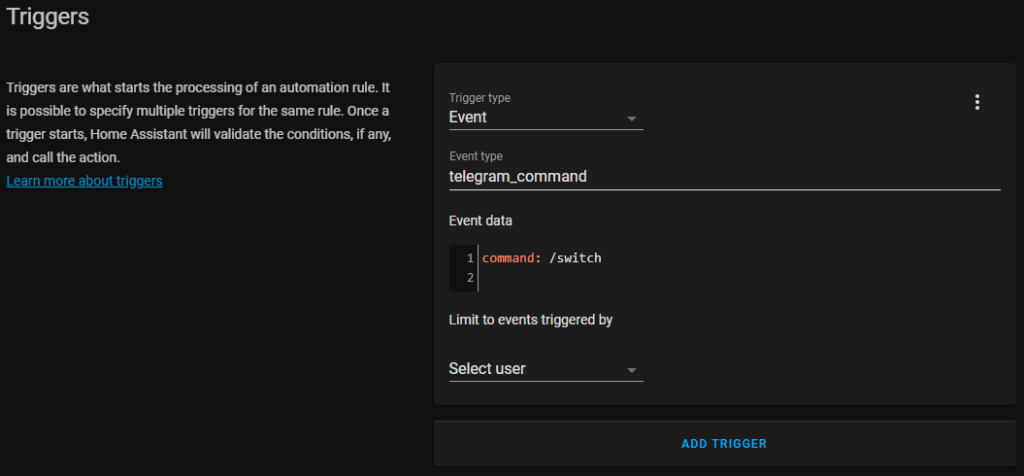
- Set the automation to trigger when the bot receives the /switch command
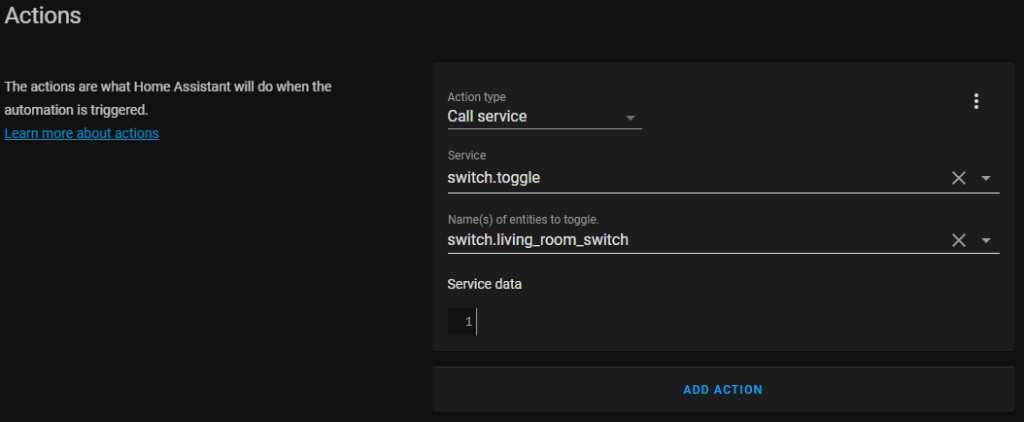
- Set the action to toggle the living room light
Integrating with third-party services
The examples above just scratch the surface of what Home Assistant can do. If you want to learn more about the possible integrations, check their integrations page. The official documentation is also a good starting point for discovering all the software features.
I’ll show how to configure more advanced features, like adding IP Cameras and Google Assistant integration, in future posts.
Back to top ↑