
Creating a full featured Kubernetes cluster for my homelab
Over the past few months, I have been tinkering with Kubernetes and trying out various k8s cluster alternatives for my homelab environment. However, I needed a cluster that could meet my specific development needs. After experimenting with several k8s distributions, I ultimately decided to bootstrap a “vanilla” cluster using kubeadm for learning purposes and also to have full flexibility and control over my environment. The kubeadm tool gives you a basic k8s cluster that lacks some desired features to support production workloads. Therefore, I had to put in some effort to add some components to get this environment to a “usable” state from a developer’s point of view.
My ultimate objective was to have a cluster capable of offering a basic cloud environment suitable for my local development needs. This included the following basic requirements:
- Multiple worker nodes for high workload availability.
- LoadBalancer service support
- Dynamically allocated persistent volumes
- Support for creating Ingress resources
- Automated support for DNS and TLS certificate management
- Basic observability and log collection support
This blog post will outline all the necessary steps required to bootstrap the cluster while also adding support for the above-listed features.
Prerequisites
To deploy our k8s cluster, we’ll need at least four bare-metal servers or virtual machines running Ubuntu 20.04. One of these servers will serve as the control-plane node and should have a minimum of 4GB of RAM to support all the necessary components. For this deployment, I’ll begin with a single control-plane node, and then add high availability to the control plane later.
The other three nodes will be used as worker nodes and should have a minimum of 1GB of RAM for the k8s components, as well as enough RAM to support the desired workloads. In my environment, I’ll be using nodes with 32GB of RAM.
All worker nodes should have an additional volume attached with at least 100GB. We will later use these volumes for dynamically allocating storage space using Ceph. This additional volume should not be partitioned and should show as a raw disk under lsblk in the same way the sdb disk appears below:
sda                         8:0    0  128G  0 disk
├─sda1                      8:1    0    1M  0 part
├─sda2                      8:2    0    2G  0 part /boot
└─sda3                      8:3    0  126G  0 part
  └─ubuntu--vg-ubuntu--lv 253:0    0   63G  0 lvm  /
sdb                         8:16   0  128G  0 disk
All the servers should also be on the same network and have unrestricted connectivity with each other.
Preparing the servers
The following steps should be executed in all servers to prepare the nodes to run the Kubernetes components.
First update and install some basic packages that will be required in the next steps:
$ sudo apt-get update
$ sudo apt-get install -y apt-transport-https ca-certificates curl
Load the required kernel modules to enable IP forward and support for iptables to handle packets crossing a bridge:
$ cat <<EOF | sudo tee /etc/modules-load.d/k8s.conf
overlay
br_netfilter
EOF

$ sudo modprobe overlay

$ sudo modprobe br_netfilter

$ cat <<EOF | sudo tee /etc/sysctl.d/k8s.conf
net.bridge.bridge-nf-call-iptables  = 1
net.bridge.bridge-nf-call-ip6tables = 1
net.ipv4.ip_forward                 = 1
EOF

$ sudo sysctl --system
After running the commands above, check if the kernel modules were loaded as expected:
$ lsmod | grep br_netfilter
$ lsmod | grep overlay
Disable swap, as Kubernetes can have performance and stability issues if swapping occurs.
$ sudo swapoff -a
$ sudo sed -e '/swap/ s/^#*/#/' -i /etc/fstab
Now we need to install a container runtime. I will be using containerd, but other runtimes are supported.
$ sudo apt-get -y install containerd
$ sudo mkdir -p /etc/containerd
$ containerd config default | sudo tee /etc/containerd/config.toml
By default, containerd does not uses the systemd cgroups driver. This is recommended in systemd systems. So edit the /etc/containerd/config.toml to change the runc cgroups driver:
$ sudo sed -i 's/SystemdCgroup \= false/SystemdCgroup \= true/g' /etc/containerd/config.toml
The final configuration should contain the snippet below:
[plugins."io.containerd.grpc.v1.cri".containerd.runtimes.runc]
  ...
  [plugins."io.containerd.grpc.v1.cri".containerd.runtimes.runc.options]
    SystemdCgroup = true
Install the containerd CNI plugins, change the version for the latest one available here.
$ wget https://github.com/containernetworking/plugins/releases/download/v1.2.0/cni-plugins-linux-amd64-v1.2.0.tgz
$ sudo mkdir -p /opt/cni/bin
$ sudo tar Cxzvf /opt/cni/bin cni-plugins-linux-amd64-v1.2.0.tgz
$ rm cni-plugins-linux-amd64-v1.2.0.tgz
Now we can enable and start the containerd service:
$ sudo systemctl enable containerd
$ sudo systemctl restart containerd
$ sudo systemctl status containerd
Before running a container to test our runtime, we need to install the nerdctl tool as a interface to the containerd daemon:
$ wget https://github.com/containerd/nerdctl/releases/download/v1.2.1/nerdctl-1.2.1-linux-amd64.tar.gz
$ sudo tar Cxzvf /usr/local/bin nerdctl-1.2.1-linux-amd64.tar.gz
To allow non-root users to run containers we should enable rootless support following instructions outlined here
$ sudo apt-get install uidmap
$ containerd-rootless-setuptool.sh install
We can now run a test container to check if the containerd daemon is working as expected:
$ nerdctl run hello-world
Installing Kubernetes
We can now install the kubernetes components. The commands below should also be executed in all nodes. At the time of this writing the latest k8s version was 1.26.
$ sudo curl -fsSLo /usr/share/keyrings/kubernetes-archive-keyring.gpg https://packages.cloud.google.com/apt/doc/apt-key.gpg
$ echo "deb [signed-by=/usr/share/keyrings/kubernetes-archive-keyring.gpg] https://apt.kubernetes.io/ kubernetes-xenial main" | sudo tee /etc/apt/sources.list.d/kubernetes.list
$ sudo apt-get update -y
$ sudo apt-get install -y kubelet=1.26.3-00 kubeadm=1.26.3-00 kubectl=1.26.3-00
It’s recommended to pin the component’s versions to avoid breaking the cluster during APT updates.
$ sudo apt-mark hold kubelet kubeadm kubectl
Creating the cluster
Let’s now use the kubeadm tool to bootstrap the cluster. The command below should be run on the master control-plane node:
$ sudo kubeadm init --apiserver-advertise-address="192.168.10.200" --apiserver-cert-extra-sans="192.168.10.200" --pod-network-cidr="10.0.0.0/16" --node-name $(hostname -s)
My external node’s address is 192.168.10.200 and I’m configuring the cluster’s internal network to use the 10.0.0.0/16 network.
After creating the cluster, the kubeadm tool should print a kubeadm join command that will be used to enroll the worker nodes to the cluster. Save this command as we will used it later.
We can now start using the cluster, let’s configure the kubectl credentials:
$ mkdir -p $HOME/.kube
$ sudo cp -i /etc/kubernetes/admin.conf $HOME/.kube/config
$ sudo chown $(id -u):$(id -g) $HOME/.kube/config
Call the cluster api to check if authentication is working:
$ kubectl api-resources
Installing the CNI plugins
We now need to install the container network plugin that will provide cluster networking. Several options are available that fit different needs. My personal preference is cillium and I’ll be installing it using:
$ CILIUM_CLI_VERSION=$(curl -s https://raw.githubusercontent.com/cilium/cilium-cli/master/stable.txt)
$ if [ "$(uname -m)" = "aarch64" ]; then CLI_ARCH=arm64; fi
$ curl -L --fail --remote-name-all https://github.com/cilium/cilium-cli/releases/download/${CILIUM_CLI_VERSION}/cilium-linux-${CLI_ARCH}.tar.gz{,.sha256sum}
$ sha256sum --check cilium-linux-${CLI_ARCH}.tar.gz.sha256sum
$ sudo tar xzvfC cilium-linux-${CLI_ARCH}.tar.gz /usr/local/bin
$ rm cilium-linux-${CLI_ARCH}.tar.gz{,.sha256sum}
$ cilium install
Check the cillium deployment status by running:
$ cilium status --wait
    /¯¯\
 /¯¯\__/¯¯\    Cilium:          OK
 \__/¯¯\__/    Operator:        OK
 /¯¯\__/¯¯\    Hubble Relay:    disabled
 \__/¯¯\__/    ClusterMesh:     disabled
    \__/

DaemonSet         cilium             Desired: 4, Ready: 4/4, Available: 4/4
Deployment        cilium-operator    Desired: 1, Ready: 1/1, Available: 1/1
Containers:       cilium             Running: 4
                  cilium-operator    Running: 1
Cluster Pods:     28/28 managed by Cilium
Image versions    cilium             quay.io/cilium/cilium:v1.13.1@sha256:428a09552707cc90228b7ff48c6e7a33dc0a97fe1dd93311ca672834be25beda: 4
                  cilium-operator    quay.io/cilium/operator-generic:v1.13.1@sha256:f47ba86042e11b11b1a1e3c8c34768a171c6d8316a3856253f4ad4a92615d555: 1
Add worker nodes to clusters
Now is possible to add the worker nodes to the cluster. Remember that kubeadm join command we saved before? Now is the time to use it. Run it in each worker node:
$ kubeadm join 192.168.10.200:6443 --token <TOKEN> --discovery-token-ca-cert-hash sha256:<HASH>
After adding all the nodes, we should be able to check each node’s status with kubectl:
$ kubectl get nodes
NAME   STATUS   ROLES           AGE   VERSION
k8s1   Ready    control-plane   3m    v1.26.3
k8s2   Ready    <none>          3m    v1.26.3
k8s3   Ready    <none>          2m    v1.26.3
k8s4   Ready    <none>          2m    v1.26.3
Now is also a good time to test the cluster network connectivity. Run the command below in the master node:
$ cilium connectivity test

✅ All 32 tests (239 actions) successful, 2 tests skipped, 1 scenarios skipped.
Adding Load Balancer support
Right now our kubernetes cluster only supports ClusterIP and NodePort services. Let’s add support for LoadBalancer services. I will be using MetalLB as the load balancer implementation.
First we need to install the Helm package manager. We will be using it a lot for the next steps:
$ curl -fsSL -o get_helm.sh https://raw.githubusercontent.com/helm/helm/main/scripts/get-helm-3
$ chmod +x get_helm.sh
$ ./get_helm.sh
Now we can install the MetalLB helm package:
$ helm install metallb metallb/metallb --namespace metallb-system --create-namespace
After the installation finishes, check if all MetalLB pods are running:
$ kubectl get pods -n metallb-system

NAME                                      READY   STATUS    RESTARTS   AGE
pod/metallb-controller-777d84cdd5-jlzvf   1/1     Running   0          17m
pod/metallb-speaker-8hfc4                 1/1     Running   0          17m
pod/metallb-speaker-np9x9                 1/1     Running   0          17m
pod/metallb-speaker-wclxs                 1/1     Running   0          17m
Let’s configure an IP address pool that will be allocated for our Load Balancers. This IP range should be free in the host network:
$ kubectl apply -n metallb-system -f - <<EOF
apiVersion: metallb.io/v1beta1
kind: IPAddressPool
metadata:
  name: default
  namespace: metallb-system
spec:
  addresses:
  - 192.168.10.10-192.168.10.99
EOF
We also need to configure how MetalLb is going to advertise the IPs over the network. MetalLB supports advertising the addresses over Layer 2 or BGP, we are going to use Layer 2 advertisement. To enable it apply the following configuration:
$ kubectl apply -n metallb-system -f - <<EOF
apiVersion: metallb.io/v1beta1
kind: L2Advertisement
metadata:
  name: default
  namespace: metallb-system
spec:
  ipAddressPools:
  - default
EOF
We should now be able to create services of type LoadBalancer.
Storage
I’ll be using a Ceph cluster managed by the Rook operator as our storage implementation.
First we need to have the lvm2 package installed (if you are already using LVM this package is already available):
$ apt-get install lvm2
Install the Rook Helm package:
$ helm repo add rook-release https://charts.rook.io/release
$ helm install --create-namespace --namespace rook-ceph rook-ceph rook-release/rook-ceph
Wait for the rook-ceph-operator pod to be available, this may take several minutes:
$ kubectl --namespace rook-ceph get pods
NAME                                            READY   STATUS              RESTARTS      AGE
rook-ceph-operator-5485cb89f6-k9j7r             1/1     Running             0         10m
Now we can create our Ceph cluster. Download this ceph_cluster.yaml manifest and apply it to the cluster:
$ kubectl apply -f ceph_cluster.yaml
It should take several minutes for the Ceph cluster to be available, we can query the CephCluster resource and wait for HEALTH_OK status condition:
$ kubectl get cephcluster rook-ceph -n rook-ceph
NAME        DATADIRHOSTPATH   MONCOUNT   AGE   PHASE   MESSAGE                        HEALTH      EXTERNAL   FSID
rook-ceph   /var/lib/rook     3          23m   Ready   Cluster created successfully   HEALTH_OK              5d79abdb-64a1-31c5-a5c2-99771d739c6e
If the Cluster creation fails, follow the troubleshooting guide available at the Rook website.
With the cluster ready, let’s create a ReplicaPool as the backend for our block storage:
$ kubectl apply -f - <<EOF
apiVersion: ceph.rook.io/v1
kind: CephBlockPool
metadata:
  name: replicapool
  namespace: rook-ceph
spec:
  failureDomain: host
  replicated:
    size: 3
EOF
Now let’s create a storage class that can be consumed by our volume claims. Apply the following manifest:
apiVersion: storage.k8s.io/v1
kind: StorageClass
metadata:
   name: rook-ceph-block
provisioner: rook-ceph.rbd.csi.ceph.com
parameters:
    clusterID: rook-ceph
    pool: replicapool
    imageFormat: "2"
    imageFeatures: layering
    csi.storage.k8s.io/provisioner-secret-name: rook-csi-rbd-provisioner
    csi.storage.k8s.io/provisioner-secret-namespace: rook-ceph
    csi.storage.k8s.io/controller-expand-secret-name: rook-csi-rbd-provisioner
    csi.storage.k8s.io/controller-expand-secret-namespace: rook-ceph
    csi.storage.k8s.io/node-stage-secret-name: rook-csi-rbd-node
    csi.storage.k8s.io/node-stage-secret-namespace: rook-ceph
    csi.storage.k8s.io/fstype: ext4
reclaimPolicy: Delete
allowVolumeExpansion: true
We should now be able to create a PersistentVolumeClaim. Let’s try with the manifest below:
apiVersion: v1
kind: PersistentVolumeClaim
metadata:
  name: pvc-test
  labels:
    app: test
spec:
  storageClassName: rook-ceph-block
  accessModes:
    - ReadWriteOnce
  resources:
    requests:
      storage: 1Gi
If everything is ok, we should see the status Bound:
$ kubectl get pvc pvc-test
NAME       STATUS   VOLUME                                     CAPACITY   ACCESS MODES   STORAGECLASS      AGE
pvc-test   Bound    pvc-8cc68cb8-97f0-409b-a47d-4018cc9b3a6b   1Gi        RWO            rook-ceph-block   10s
The rook-ceph operator exposes a dashboard that can be used to monitor the health of the Ceph cluster. We are going to expose it outside the cluster, but before that we need add support for Ingress resources.
Installing an Ingress controller
To expose HTTP services outside the cluster we are going to use the Nginx Ingress Controller. Use the command below to install it:
$ helm upgrade --install ingress-nginx ingress-nginx \ --repo https://kubernetes.github.io/ingress-nginx \ --namespace ingress-nginx --create-namespace
Check if the controller’s pod is ready:
$ kubectl get pods -n ingress-nginx
NAME                                        READY   STATUS    RESTARTS   AGE
ingress-nginx-controller-5c6fd54c59-58496   1/1     Running   0          13m
Before creating our first Ingress resource, let’s also add support for TLS certificates and DNS updates.
Installing cert-manager
The cert-manager operator can be used for automatically obtaining and renewing and TLS certificates. Use the following commands to install the operator:
$ helm repo add jetstack https://charts.jetstack.io
$ helm repo update
$ helm install cert-manager jetstack/cert-manager --namespace cert-manager  --create-namespace --version v1.11.0  --set installCRDs=true
After the installation we should see all the operator pods in a Running status:
$ kubectl get pods -n cert-manager
NAME                                       READY   STATUS    RESTARTS   AGE
cert-manager-64f9f45d6f-9b5ft              1/1     Running   0          66s
cert-manager-cainjector-56bbdd5c47-55czd   1/1     Running   0          66s
cert-manager-webhook-d4f4545d7-wds6l       1/1     Running   0          66s
Now we need to configure a certificate issuer. I’m going to create a Let’s Encrypt issuer that will generate certificates for the domain k8s.mauriciomaia.dev. I’ve setup a DNS server as the master for this domains that supports the RFC-2136 for dynamically updating NS records. The cert-manager operator allow us to use this capability in conjuction with Let’s Encrypt for validating domain ownership.
The dynamic DNS update feature will require the TSIG credentials to our DNS server, let’s store it in a secret using:
$ kubectl create secret generic k8s-rfc2136-tsig --from-literal=value="TSIG KEY HERE" -n cert-manager
Let’s create a Issuer first, apply the following manifest:
apiVersion: cert-manager.io/v1
kind: Issuer
metadata:
  name: letsencrypt-prod
  namespace: cert-manager
spec:
  acme:
    email: [email protected]
    server: https://acme-v02.api.letsencrypt.org/directory
    privateKeySecretRef:
      name: letsencrypt-prod
    solvers:
    - selector:
        dnsZones:
          - "k8s.mauriciomaia.dev"
      dns01:
        rfc2136:
          nameserver: k8s-ns.mauriciomaia.dev
          tsigKeyName: k8s.mauriciomaia.dev
          tsigAlgorithm: HMACSHA256
          tsigSecretSecretRef:
            name: k8s-rfc2136-tsig
            key: value
I’m going to generate a wildcard certificate for the domain *.k8s.mauriciomaia.dev and then sync the certificate keys to the namespaces that will need access to it. To make this synchronization work let’s install the reflector operator:
$ helm repo add emberstack https://emberstack.github.io/helm-charts
$ helm repo update
$ helm upgrade --install reflector emberstack/reflector
We should now be able to request a certificate using the following manifest:
apiVersion: cert-manager.io/v1
kind: Certificate
metadata:
  name: k8s-wildcard-crt
  namespace: cert-manager
spec:
  secretName: k8s-wildcard-secret
  issuerRef:
    kind: Issuer
    name: letsencrypt-prod
  commonName: "*.k8s.mauriciomaia.dev"
  dnsNames:
    - "*.k8s.mauriciomaia.dev"
  secretTemplate:
    annotations:
      reflector.v1.k8s.emberstack.com/reflection-allowed: "true"
      reflector.v1.k8s.emberstack.com/reflection-auto-enabled: "true"
Note the reflector annotations that will sync the certificate keys to all namespaces. It is possible to restrict where the secret is copied using the reflection-allowed-namespace annotation, check the documentation for more details.
If everything is working as expected, we should see the certificate with status Ready:
$ kubectl get certificate k8s-wildcard-crt -n cert-manager
NAME               READY   SECRET                AGE
k8s-wildcard-crt   True    k8s-wildcard-secret   11m
The secret k8s-wildcard-secret will contain the certificate keys and it will be copied to all namespaces.
$ kubectl get secret k8s-wildcard-secret -n cert-manager
NAME                  TYPE                DATA   AGE
k8s-wildcard-secret   kubernetes.io/tls   2      11m
Installing external-dns
Now it’s the time to add support for dynamical DNS records. Let’s install the external-dns operator. My environment will use a DNS server with support for RFC-2136 as the master for the domain k8s.mauriciomaia.dev. To configure cert-manager with RFC-2136 support, download the external_dns.yaml, edit it to change the domains and credentials to your environment and apply it using:
$ kubectl apply -f external_dns.yaml
Then check if the external-dns pod is running:
$ kubectl get pods -n external-dns
NAME                            READY   STATUS    RESTARTS   AGE
external-dns-55c6b496b6-2m5cw   1/1     Running   0          113s
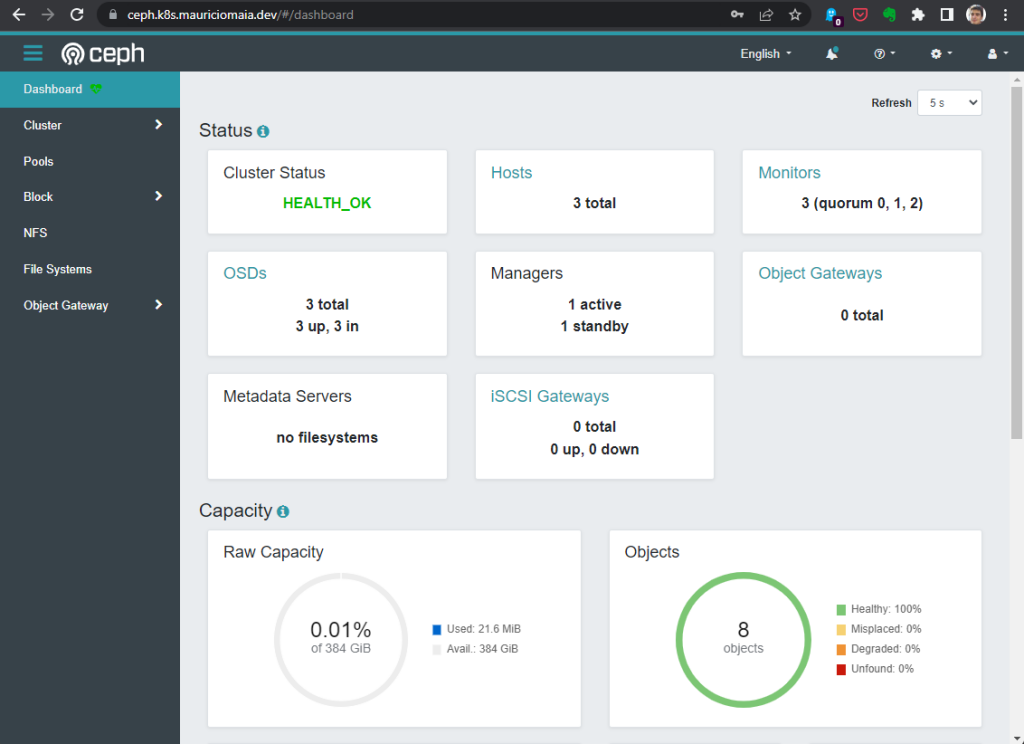
Exposing the Ceph dashboard
Now we have everything we need to expose the Ceph dashboard in it’s own domain and with a valid TLS certificate. Let’s apply the following manifest:
apiVersion: networking.k8s.io/v1
kind: Ingress
metadata:
  name: rook-ceph-mgr-dashboard
  namespace: rook-ceph
  annotations:
    nginx.ingress.kubernetes.io/backend-protocol: "HTTPS"
    nginx.ingress.kubernetes.io/server-snippet: |
      proxy_ssl_verify off;
spec:
  ingressClassName: nginx
  tls:
   - hosts:
     - ceph.k8s.mauriciomaia.dev
     secretName: k8s-wildcard-secret
  rules:
  - host: ceph.k8s.mauriciomaia.dev
    http:
      paths:
      - path: /
        pathType: Prefix
        backend:
          service:
            name: rook-ceph-mgr-dashboard
            port:
              name: https-dashboard
We should be able to access the dashboard now:
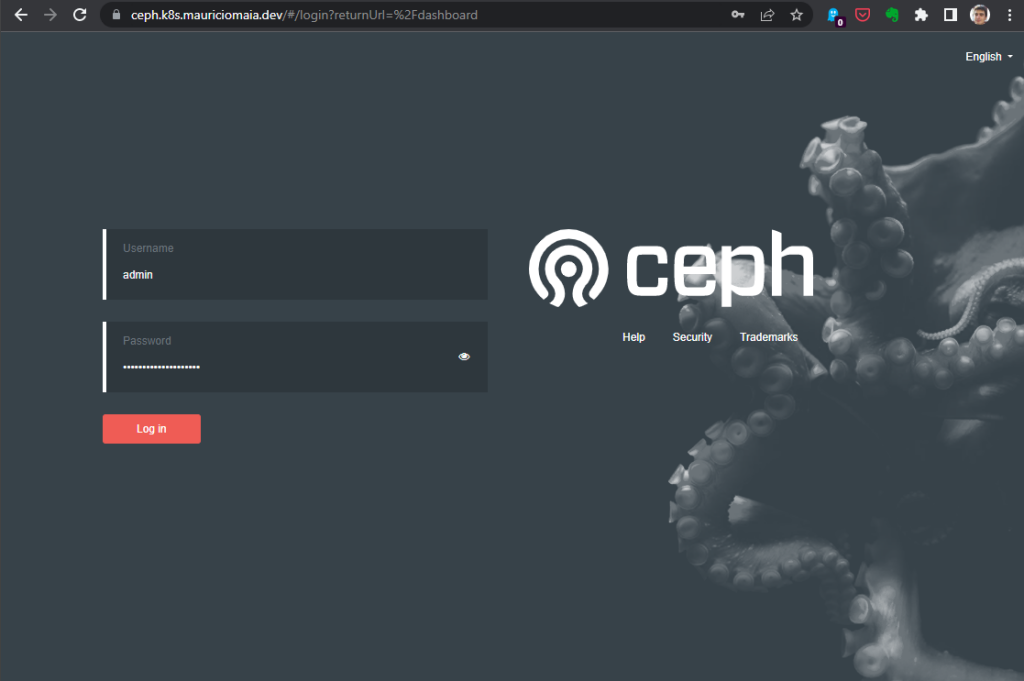
The default username is admin and you can get the password using:
$ kubectl get secret -n rook-ceph rook-ceph-dashboard-password --template= | base64 -d
After logging in we will be able to get an overview of the Ceph cluster health:
Deploying our first workload
Now we have everything required to deploy our first application. Let’s test it by deploying a basic Wordpress instance.
First, create a namespace for the Wordpress components:
$ kubectl create ns wordpress
MySql Deployment
Our Wordpress deployment will require a MySql database to host our persistent data. The MySql deployment requires a secret with the root database password, create the secret using:
$ kubectl create secret generic mysql-pass --from-literal=password=$(openssl rand -hex 16) --namespace wordpress
This will create a Secret with a random password entry called mysql-pass
Now we can deploy the required resources using the snippet below:
apiVersion: v1
kind: PersistentVolumeClaim
metadata:
  name: mysql-pv-claim
  labels:
    app: wordpress
spec:
  storageClassName: rook-ceph-block
  accessModes:
    - ReadWriteOnce
  resources:
    requests:
      storage: 5Gi
---
apiVersion: v1
kind: Service
metadata:
  name: wordpress-mysql
  labels:
    app: wordpress
spec:
  ports:
    - port: 3306
  selector:
    app: wordpress
    tier: mysql
---
apiVersion: apps/v1
kind: Deployment
metadata:
  name: wordpress-mysql
  labels:
    app: wordpress
spec:
  selector:
    matchLabels:
      app: wordpress
      tier: mysql
  strategy:
    type: Recreate
  template:
    metadata:
      labels:
        app: wordpress
        tier: mysql
    spec:
      containers:
      - image: mysql:5.6
        name: mysql
        env:
        - name: MYSQL_ROOT_PASSWORD
          valueFrom:
            secretKeyRef:
              name: mysql-pass
              key: password
        ports:
        - containerPort: 3306
          name: mysql
        volumeMounts:
        - name: mysql-persistent-storage
          mountPath: /var/lib/mysql
      volumes:
      - name: mysql-persistent-storage
        persistentVolumeClaim:
          claimName: mysql-pv-claim
Save the file above to mysql.yaml and apply it using following command:
$ kubectl apply -f mysql.yaml -n wordpress
persistentvolumeclaim/mysql-pv-claim created
service/wordpress-mysql created
deployment.apps/wordpress-mysql created
Wait for the MySql deployment to be ready:
$ kubectl get deploy -n wordpress
NAME              READY   UP-TO-DATE   AVAILABLE   AGE
wordpress-mysql   1/1     1            1           9m24s
Deploying Wordpress
Use the following manifest to deploy the wordpress instances:
apiVersion: v1
kind: Service
metadata:
  name: wordpress
  labels:
    app: wordpress
spec:
  ports:
    - port: 80
  selector:
    app: wordpress
    tier: frontend
---
apiVersion: v1
kind: PersistentVolumeClaim
metadata:
  name: wordpress-pv-claim
  labels:
    app: wordpress
spec:
  storageClassName: rook-ceph-block
  accessModes:
    - ReadWriteOnce
  resources:
    requests:
      storage: 5Gi
---
apiVersion: apps/v1
kind: Deployment
metadata:
  name: wordpress
  labels:
    app: wordpress
spec:
  selector:
    matchLabels:
      app: wordpress
      tier: frontend
  strategy:
    type: Recreate
  template:
    metadata:
      labels:
        app: wordpress
        tier: frontend
    spec:
      containers:
      - image: wordpress:4.8-apache
        name: wordpress
        env:
        - name: WORDPRESS_DB_HOST
          value: wordpress-mysql
        - name: WORDPRESS_DB_PASSWORD
          valueFrom:
            secretKeyRef:
              name: mysql-pass
              key: password
        ports:
        - containerPort: 80
          name: wordpress
        volumeMounts:
        - name: wordpress-persistent-storage
          mountPath: /var/www/html
      volumes:
      - name: wordpress-persistent-storage
        persistentVolumeClaim:
          claimName: wordpress-pv-claim
Apply the file above with:
$ kubectl apply -f wordpress.yaml -n wordpress
service/wordpress created
persistentvolumeclaim/wordpress-pv-claim created
deployment.apps/wordpress created
Check if the new deployment is running:
$ kubectl get deploy wordpress -n wordpress
NAME        READY   UP-TO-DATE   AVAILABLE   AGE
wordpress   1/1     1            1           80s
Our next step will be exposing our Wordpress server to the world using TLS by creating an Ingress resource:
apiVersion: networking.k8s.io/v1
kind: Ingress
metadata:
  name: wordpress
  namespace: wordpress
spec:
  ingressClassName: nginx
  tls:
   - hosts:
     - wordpress.k8s.mauriciomaia.dev
     secretName: k8s-wildcard-secret
  rules:
  - host: wordpress.k8s.mauriciomaia.dev
    http:
      paths:
      - path: /
        pathType: Prefix
        backend:
          service:
            name: wordpress
After applying the manifest above, we can check if the Ingress is available using:
$ kubectl get ing -n wordpress
NAME        CLASS   HOSTS                            ADDRESS         PORTS     AGE
wordpress   nginx   wordpress.k8s.mauriciomaia.dev   192.168.10.81   80, 443   24s
The Wordpress instance should now be acessible in the local network:
Monitoring and observability
Our cluster still lacks supports for automating the monitoring and observability of all the workloads. I’ll detail how we can add this feature in a future post.
Back to top ↑