
Authenticating a React Application with AWS Cognito
This post will show how to integrate the AWS Cognito Authentication Service with a React App.
Prerequisites
Check if your environment has the following requirements installed:
You will also need an AWS account with IAM administrator privileges.
Installig the AWS Amplify CLI
It is possible to manually create all the AWS resources using the AWS Console, but this process is tedious and error-prone. AWS Amplify solves this problem by giving us a set of tools that speed up the development of Web and Mobile applications that directly use AWS Services.
First, let’s install the AWS Amplify Command Line Tools:
$ npm install -g @aws-amplify/cli
After the installation, the tool must be configured with the following command:
$ amplify configure
Follow these steps to set up access to your AWS account:`
Sign in to your AWS administrator account:
https://console.aws.amazon.com/
Press Enter to continue`
Specify the AWS Region
? region: us-east-1
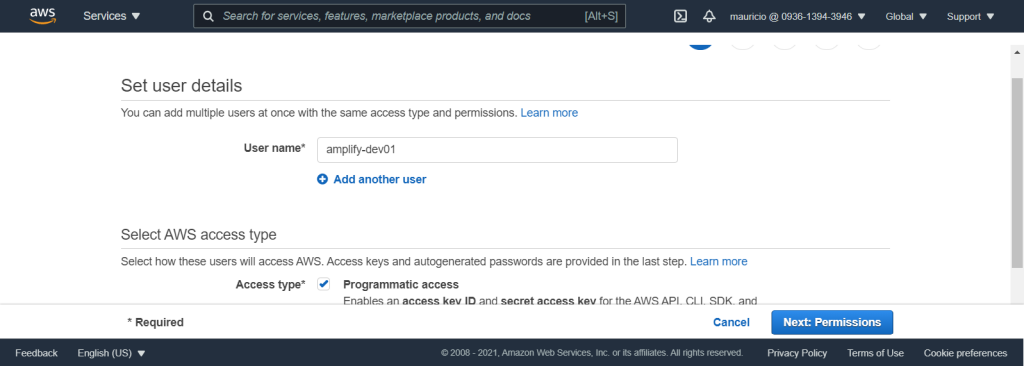
Specify the username of the new IAM user:
? user name: amplify-dev01
Complete the user creation using the AWS console
https://console.aws.amazon.com/iam/home?region=us-east-1#/users...
Press Enter to continue
At this point, the tool will ask us to login into our AWS Account to create a new IAM user. Follow the steps and certify that the new user has the AdministratorAccess policy.
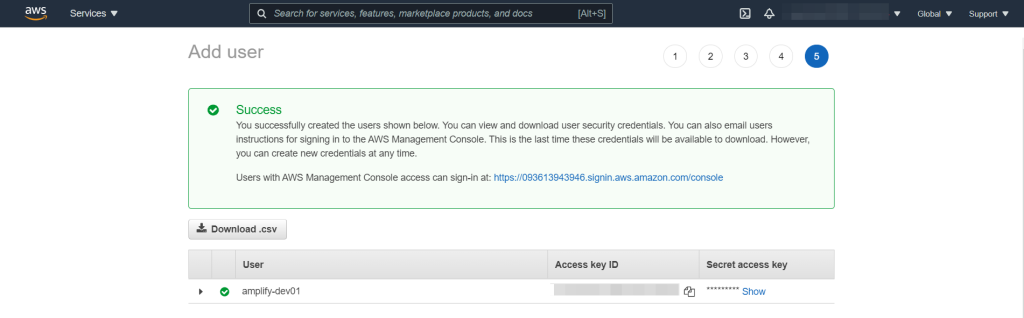
After the user is successfully created, the AWS console will display the credentials of the new user. This information is displayed only once. Save the credentials and fill in the information on the command line.
Enter the access key of the newly created user:
? accessKeyId:  ********************
? secretAccessKey:  ****************************************
This would update/create the AWS Profile in your local machine
? Profile Name:  amplify

Successfully set up the new user.
Create the React App
Now let’s integrate the Amplify authentication with our React application. The commands below will create a new Typescript React application and add the AWS Amplify dependencies:
$ npx create-react-app frontend --template typescript
$ npm install aws-amplify @aws-amplify/ui-react --save
Initializing the Amplify SDK
Execute the following command on the root of the React application:
$ amplify init
Note: It is recommended to run this command from the root of your app directory
? Enter a name for the project videochat
The following configuration will be applied:

Project information
| Name: videochat
| Environment: dev
| Default editor: Visual Studio Code
| App type: javascript
| Javascript framework: react
| Source Directory Path: src
| Distribution Directory Path: build
| Build Command: npm.cmd run-script build
| Start Command: npm.cmd run-script start

? Initialize the project with the above configuration? Yes
Using default provider  awscloudformation
? Select the authentication method you want to use: AWS profile

For more information on AWS Profiles, see:
https://docs.aws.amazon.com/cli/latest/userguide/cli-configure-profiles.html

? Please choose the profile you want to use amplify
Adding backend environment dev to AWS Amplify Console app:
| Initializing project in the cloud...
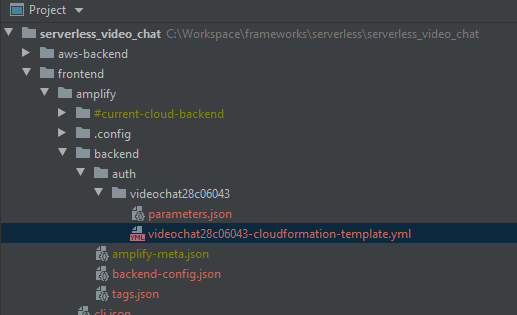
The init command will set up all the required resources on the AWS account to support the project and create a aws-exports.js file on the root of the src with the configuration of the Amplify SDK for the current project. This command will also create a amplify folder on the project’s root that can be added to source control.

Adding AWS Cognito Support
Next, we will add the AWS Cognito integration to the project with the following command:
$ amplify add auth

Using service: Cognito, provided by: awscloudformation

 The current configured provider is Amazon Cognito.

 Do you want to use the default authentication and security configuration? Default configuration
 Warning: you will not be able to edit these selections.
 How do you want users to be able to sign in? Email
 Do you want to configure advanced settings? Yes, I want to make some additional changes.
 Warning: you will not be able to edit these selections.
 What attributes are required for signing up? Email, Name (This attribute is not supported by Signinwithapple.)
 Do you want to enable any of the following capabilities?
Successfully added auth resource videochat28c06043 locally
On the example above, we have set the Name and Email fields as required to signup to our application.
This command will create an AWS Cloud Formation script to set up the Cognito User Pool on AWS.
We can execute the CloudFormation script to create the resources using:
$ amplify auth push
Current Environment: dev

| Category | Resource name     | Operation | Provider plugin   |
| -------- | ----------------- | --------- | ----------------- |
| Auth     | videochat28c06043 | Create    | awscloudformation |
? Are you sure you want to continue? Yes
\ Updating resources in the cloud. This may take a few minutes...
Creating the Login Page
The @aws-amplify/ui-react offers a set of UI components that allows us to easily integrate the Cognito authentication flow to our React Application. Here is an example that implements the login page with a custom sign-up page that includes the field name we added before.
import React from 'react';
import {Amplify} from "aws-amplify";
import awsExports from './aws-exports';
import {AmplifyAuthenticator, AmplifySignIn, AmplifySignUp} from "@aws-amplify/ui-react";
import Main from "./components/Main";

Amplify.configure(awsExports)

function App() {
    return (
        <AmplifyAuthenticator>
              <h1>Hello, world!</h1>
              <AmplifySignUp
                  slot="sign-up"
                  usernameAlias="email"
                      formFields={[
                          {
                              type: "email",
                              label: "E-mail",
                              placeholder: "E-mail",
                              inputProps: { required: true, autocomplete: "email" },
                          },
                          {
                              type: "password",
                              label: "Password",
                              placeholder: "Password",
                              inputProps: { required: true, autocomplete: "new-password" },
                          },
                          {
                              type: "name",
                              label: "Name",
                              placeholder: "Full name",
                          }
                      ]}/>
              <AmplifySignIn slot="sign-in" usernameAlias="email" />
        </AmplifyAuthenticator>
    );
}

export default App;
Now we can start our application and the authentication flow should be fully working:

Authenticating with the back-end
To authenticate our users on the back-end we must send with every request the Cognito’s JWT token. Here a example of how the application can retrieve the current token:
    const session = await Auth.currentSession();
    if(session.isValid()) {
        const token = session.getIdToken().getJwtToken();
        const request = fetch(url, {
              method: 'get',
              headers: {
                   'Authorization': 'Bearer ' + token
              }
        };
    }
Follow this instructions to validate the JWT token on the backend.
Resources
To learn more about the AWS Amplify SDK check the links below:
- https://docs.amplify.aws/
- https://docs.amplify.aws/ui/auth/authenticator/q/framework/react